Explorer Maps
by Andrea Messersmith
click on photo for larger view
by Andrea Messersmith
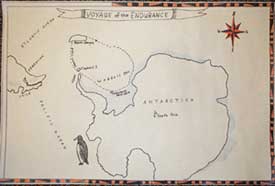
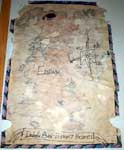
As part of our fifth grade curriculum, the class was writing explorer reports. We became inspired to make maps for the reports when a student brought in a map she had rescued from a refuse heap. The map was a copy of an original from the world of perhaps the seventeenth century. The map was mounted on plywood. Time and weather had partially worn away the decorative border, but the compass rose, an object we had studied was intact. Place names had been written in a spidery hand. Our maps were created over several days depending on the meticulous nature of the individual mapmaker.
Supplies:Procedure:
- white paper 12" x 18"
- colored pencils
- fine tip Sharpie
- ultra fine tip Sharpie
- pencils
- coffee (optional)
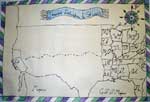
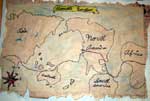
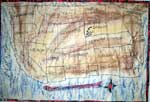
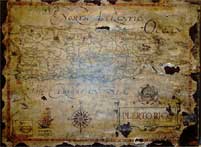
- First, students "age" their maps by painting them with a strong coffee solution. Spattering the painted surface creates interesting "parchment" effects. Allow a day for the paper to dry.
- Next, students create a geometric border about one quarter inch in diameter around the edge of the map. The border can be simple or elaborate according to the preference of the student. The border is colored (black and a second color is very effective). Using the ultra fine tip Sharpie for the black of the border intensifies the color.
- Using a #2 pencil, students draw freehand the lands of their explorer's travels. Students will need reference maps to accomplish this portion of the process. Before students begin to draw in land masses, demonstrate and have them practice using the #2 pencil to create a light line, easily erasable.
- When the student is satisfied with the drawing, the pencil line can be traced with a fine point Sharpie.
- A broken line is drawn on the map to follow the explorer's travels.
- A legend is drawn to identify the meaning of the lines, or a banner at the top or bottom of the map may be used to identify the explorer.
- Decorate the map with a small compass rose drawn in two colors. Our students had practiced drawing compass roses beforehand in anticipation of the map-making project.
The map can also be decorated with other devices: a sea serpent or other sea creature, a boat, or any small picture appropriate to the particular age and nature of the exploration.- We finished our maps by adding color with colored pencils. Some students preferred a colorful map while others preferred only touches of color.
Please click on image for larger view
Back
© Deborah Padrick 2001